After many years of my brother making excuses that he can't paint his miniatures because he doesn't have a suitable place for it, I decided to give him a small gift - a hand-made paint station. Not only was it easy and fun to make (as almost everything related to Warzone and wargaming in general) but it was extra cheap as I decided to make use of some spare materials blocking my drawers. I was so satisfied with my effort that I decided to share the progress.
But first things first - here is the list of things I used.
- Cardboard/cardboard box
- Gerber Multitool (but any small knife will do)
- Scissors
- Hot glue gun
- Double-sided tape
- Pencil
- Brushes, colours, yoghurt cup (just to measure how big hole I have to make in a holder)
- Wooden tongue depressors (but popsicle sticks will do the same job)
- Sliding knife (for cardboard/carpet cutting)
- Ruler
- Plastic sheet cut from the lid of a box my girlfriend uses to carry a cavy in (not necessary)
First friendly advice.... take few minutes to think about how you want your paint station to look in the end. It is also good to think through on which side you will have your water and brushes. DON'T DO IT AS I DID... I had no idea and have to make a long pause in the middle of the process. Most of you will think of 1000 times better design but here is how I built the paint station meant for my brother (right handed).
1. Measuring and cutting cardboard base/sides
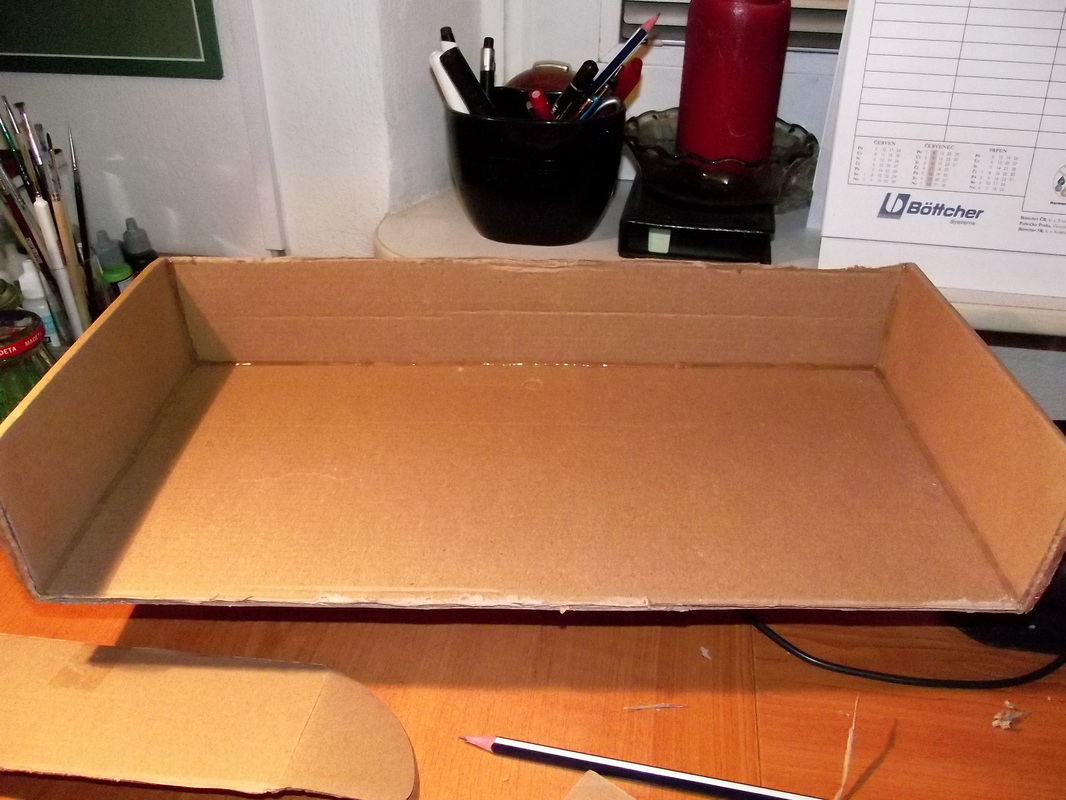
Dimensions of the paint station were actually given by the size of the box I used as a base and also by the dimensions of the plastic sheet used to strengthen the base in the end. If you are not using the box, you will have to glue side boards to a base. I used low-profile cardboard box so it was quite easy to cut away its lid and use it further on in the process. In order for the station to be strong enough, I glued lower side of the box into the upside down turned lid making it two layers of cardboard. To glue these parts together I used combination of double-sided tape in the middle and hot glue on the sides. And here is a result...
1. Measuring and cutting cardboard base/sides
Dimensions of the paint station were actually given by the size of the box I used as a base and also by the dimensions of the plastic sheet used to strengthen the base in the end. If you are not using the box, you will have to glue side boards to a base. I used low-profile cardboard box so it was quite easy to cut away its lid and use it further on in the process. In order for the station to be strong enough, I glued lower side of the box into the upside down turned lid making it two layers of cardboard. To glue these parts together I used combination of double-sided tape in the middle and hot glue on the sides. And here is a result...
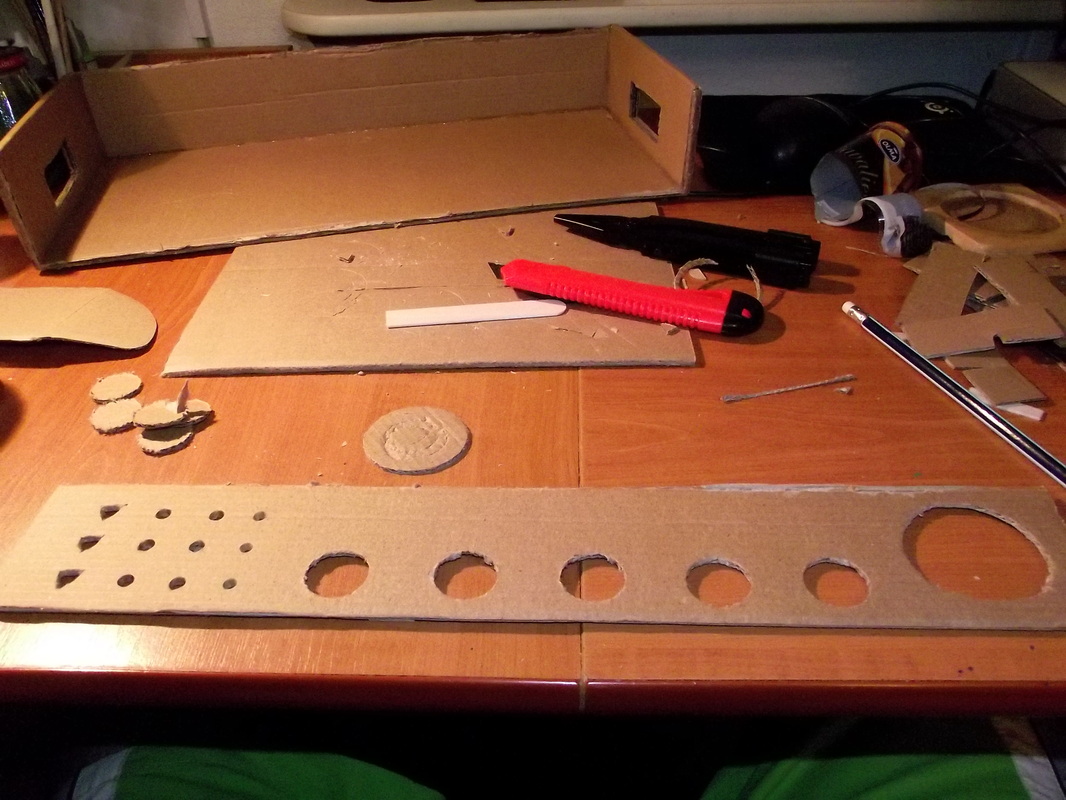
2. Measuring and cutting tray for holding brushes/water/paints and cutting handles
This is a part where I had to make a break and think of the layout for a while. As my brother is right-handed, I decided to put water pot on the right side (which is only logical as you don't want to move a wet brush with paint over miniatures standing in the middle of your station - accidents happen). Another problem was to decide how many brush holes I will make and the same goes for paint pots because we use two different types of paints. This part is really only dependent on your imagination/colours you use.
This is a part where I had to make a break and think of the layout for a while. As my brother is right-handed, I decided to put water pot on the right side (which is only logical as you don't want to move a wet brush with paint over miniatures standing in the middle of your station - accidents happen). Another problem was to decide how many brush holes I will make and the same goes for paint pots because we use two different types of paints. This part is really only dependent on your imagination/colours you use.
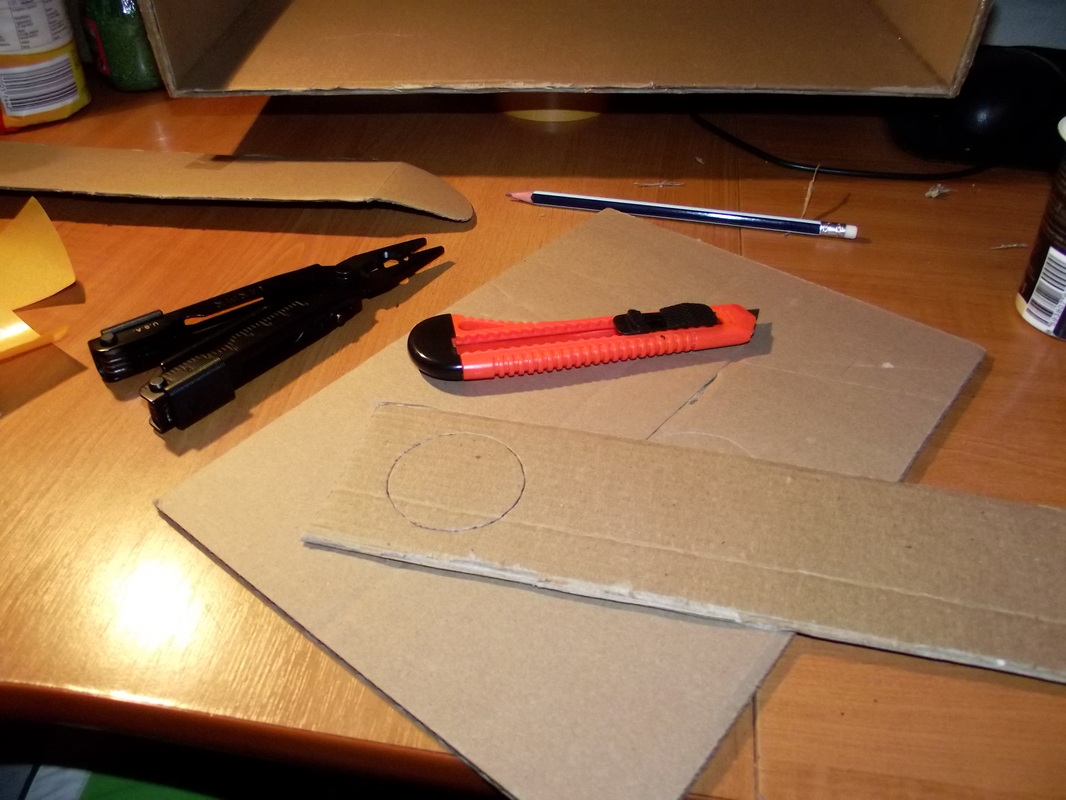
So, take long enough sheet of cardboard that you will be able to glue to the sides of the station and cut a strip of suitable width (in my case this was a strip wide enough to take a yoghurt cup for water and two rows of holes for paint pots).


Using your brain, pencil and brush/paint pots make suitable number of holes in the tray according to your plan. Once done, your tray will probably look something like this...
At this point you already know how wide your paint tray will be and you should decide how high the tray will sit in the paint station so you can cut handles to the sides of your station.
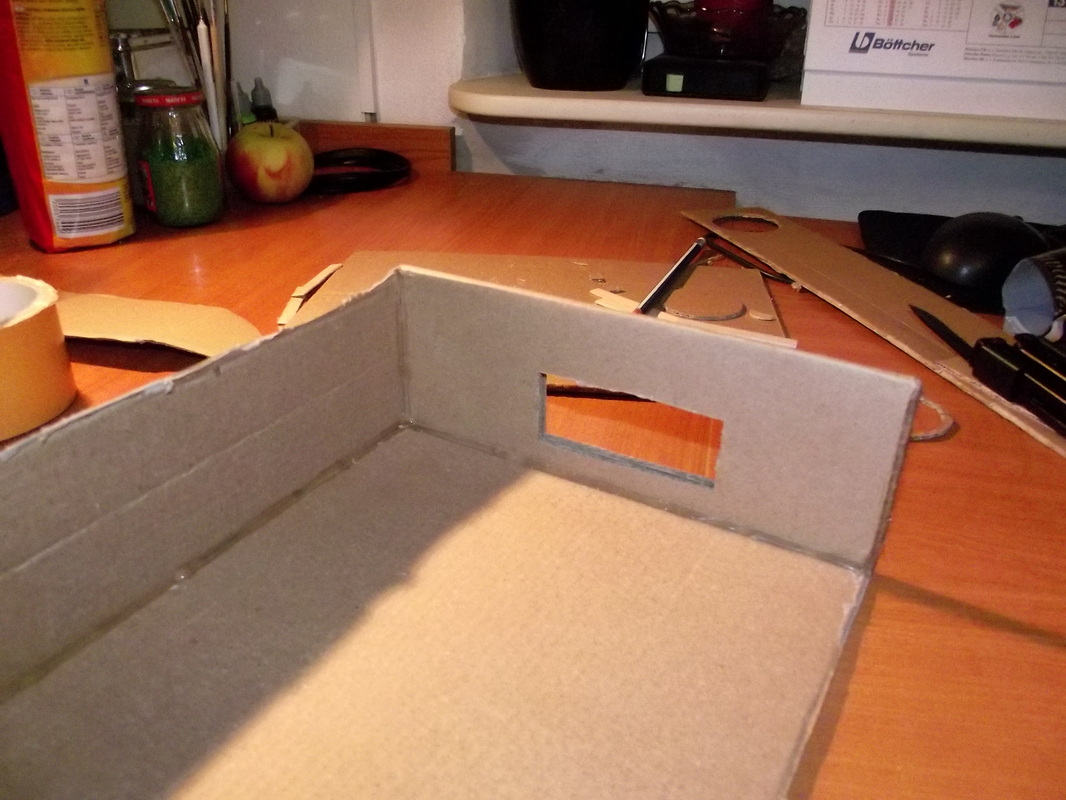

Once you know how high the tray will sit (to hold paint pots, brushes and water firmly enough) cut holes into the sides of the station from right under the decided level down. Also bear in mind that it should be wide enough to stick your hand inside to allow firm grip of the station to protect your precioussss miniatures. Now that you have the handling holes cut, try sticking your hands through (fingers - there is no point in sticking your whole hands up to elbows inside, right??). You should feel whether it is strong enough to hold. In this phase I decided to strengthen a smoothen the handles by gluing on some wooden tongue depressors which make handling the station much more comfortable than just holes cut into the cardboard. See the following pictures...


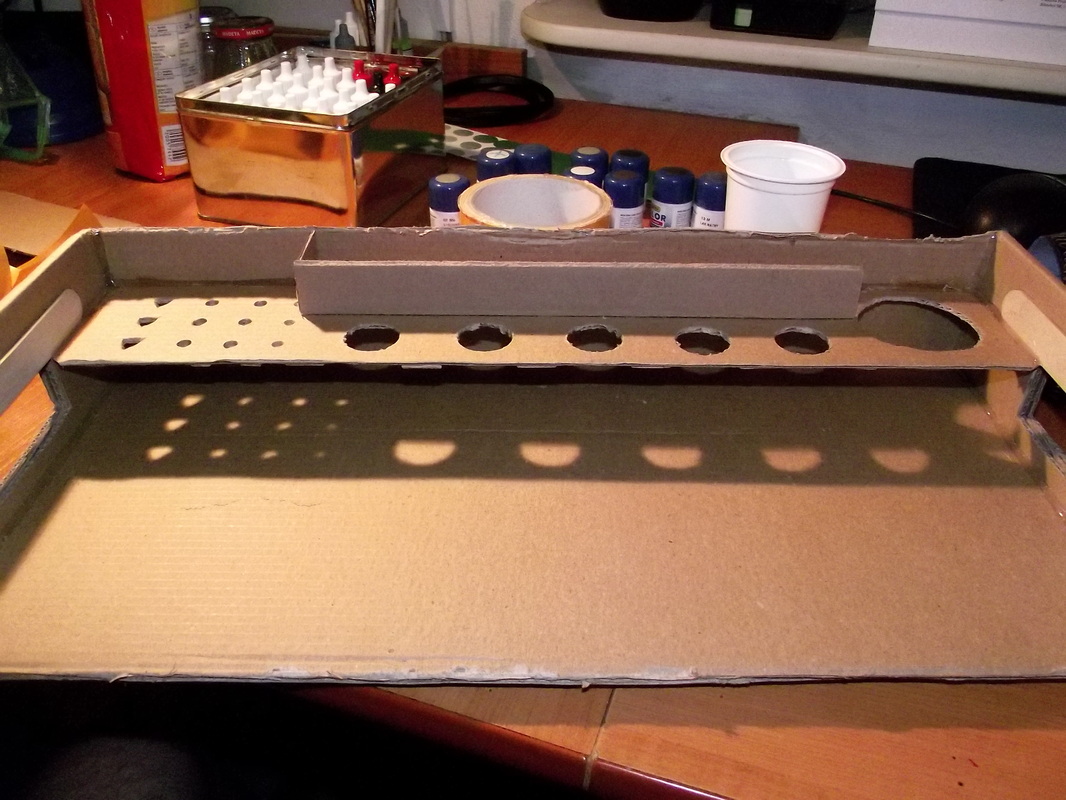
3. Gluing the tray into the station
If you decided to glue on the handle supports just as I did, you can use them as leads for gluing the tray. Before you glue on the tray, check the base and sides of the station and, if needed, strengthen joints and smoothen edged with hot glue. It is also suitable to strengthen the tray by gluing on some popsicle sticks/tongue depressors on the underside between the holes (which I decided to do as there was no bearing part and the tray was glued only to the right, left and back sides of the station). Alternatively, you can glue the tray to the three sides and use pieces of cardboard glued between the tray and base as a support (which I decided not to do in order to be able to glue on the plastic board and also use the space under the tray). Anyway I am sure you will be able to come up with million smarter solutions. This is what my paint station looked like after this step. (Note that my paint pot holding tray has a small compartment to store pots of AGAMA paint and five holes that can hold either Army Painter or Vallejo paints. It can also hold three triangular Army Painter brushes, three larger, three medium and three small round brushes)
If you decided to glue on the handle supports just as I did, you can use them as leads for gluing the tray. Before you glue on the tray, check the base and sides of the station and, if needed, strengthen joints and smoothen edged with hot glue. It is also suitable to strengthen the tray by gluing on some popsicle sticks/tongue depressors on the underside between the holes (which I decided to do as there was no bearing part and the tray was glued only to the right, left and back sides of the station). Alternatively, you can glue the tray to the three sides and use pieces of cardboard glued between the tray and base as a support (which I decided not to do in order to be able to glue on the plastic board and also use the space under the tray). Anyway I am sure you will be able to come up with million smarter solutions. This is what my paint station looked like after this step. (Note that my paint pot holding tray has a small compartment to store pots of AGAMA paint and five holes that can hold either Army Painter or Vallejo paints. It can also hold three triangular Army Painter brushes, three larger, three medium and three small round brushes)
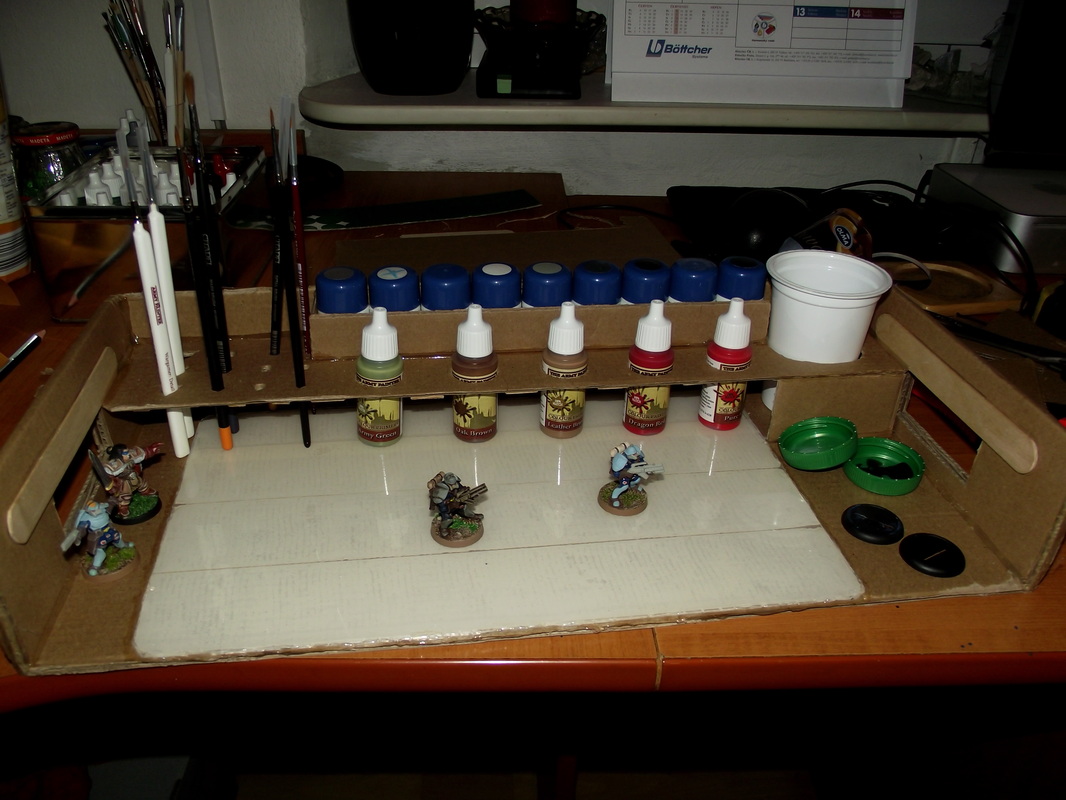
4. Tuning your paint station
At this phase, you have your paint station ready to use. I had mine ready too but decided to tune it up a bit to make it stronger and more resilient. That I achieved by taping/gluing in a plastic board that was left in my drawer after making some alterations on a cavy box. I simply took the plastic board, put some double-sided tape on its underside and stuck it into the middle of the paint station. See the next picture.
At this phase, you have your paint station ready to use. I had mine ready too but decided to tune it up a bit to make it stronger and more resilient. That I achieved by taping/gluing in a plastic board that was left in my drawer after making some alterations on a cavy box. I simply took the plastic board, put some double-sided tape on its underside and stuck it into the middle of the paint station. See the next picture.


As before, it is really handy to secure/smoothen the plastic board by hot gluing its sides to the cardboard base. I also decided to cover the right side, where yoghurt cup sits, with a piece of cardboard but this is just a cosmetic adjustment and has no real use. At the end, it is good to check sides, contact surfaces, etc. and apply some hot glue where necessary or desired to make the whole paint station stronger.
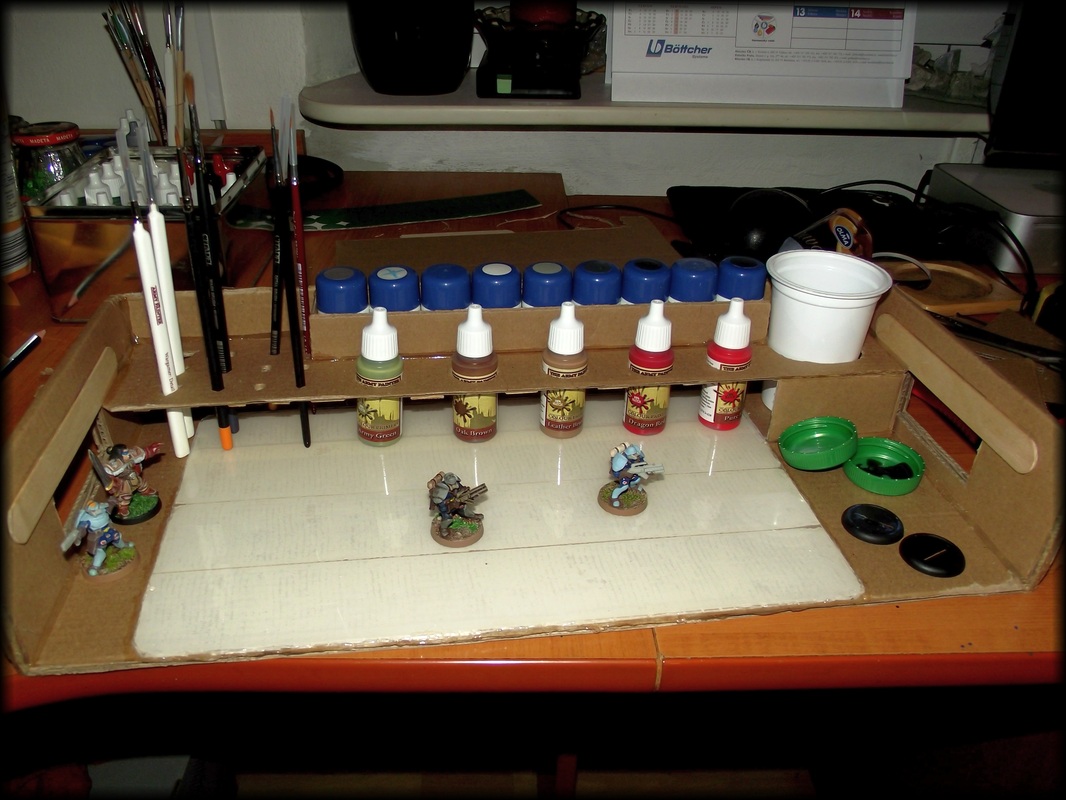
Tadaaaa....now you have your paint station completed and ready to serve its purpose. Only thing that remains is to put in some paints, brushes and minis and take a picture you could post on your Facebook....I mean website...I mean... to start painting.
Tadaaaa....now you have your paint station completed and ready to serve its purpose. Only thing that remains is to put in some paints, brushes and minis and take a picture you could post on your Facebook....I mean website...I mean... to start painting.
I hope at least some of you will find this article useful. Should you have any questions or comments, please feel free to leave a comment or e-mail me.
 RSS Feed
